SiriusXM Music for Business | GDI-SXBR2 Radio
Thank you for purchasing the GDI-SXBR2 Business Radio!
Your new GDI-SXBR2 Business Internet Radio comes with everything you need to enjoy SiriusXM in your office, retail store, restaurant, or any other place of business. The video above will walk you through the basic setup and functions of your new SiriusXM business radio, and you can use the article below for reference. We are very happy to have you as part of the Sonu Media family, and look forward to providing your business with the best licensed music services.
GDI-SXBR2 Basic Features:
– Large color LCD display with album art and channel information
– Powerful full-range sound with adjustable equalizer
– Access SiriusXM On Demand shows
– Rewind up to five hours and hear shows from the beginning with Start Now
– Pause, rewind and replay live radio
– Set multiple alarms, sleep and snooze timers on the integrated clock
– Select 10 favorite channels for easy access
– Use a wired Ethernet connection or WiFi 802.11 b/g/n wireless Internet connection with WEP and WPA security
What’s in the box?
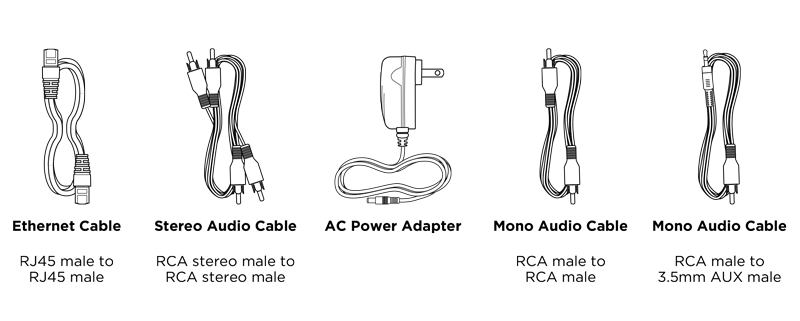
Upon receiving your GDI-SXBR2, the following components will accompany your business radio unit.
Ethernet Cable
RJ45 male to RJ45 male
Mono Audio Cable
RCA male to RCA male
Mono Audio Cable
RCA male to 3.5mm AUX male
Stereo Audio Cable AC Power Adapter
RCA stereo male to RCA stereo male
Connect to the Internet
Sonu Media strongly suggests connecting your SiriusXM GDI-SXBR2 Business Radio via an Ethernet Wired Connection. This is to ensure a more reliable streaming service for your business, and reduce simple connection issues synonymous with general wireless connectivity. The unique “Username” and “Password” credentials used to sign your business into the active SiriusXM Music for Business network will already be loaded into your business radio when you receive it. Completing your internet connection should enable you to start streaming SiriusXM licensed music channels immediately. In the event your radio arrives, and you are either prompted to enter your credentials or cannot connect to the internet at your business, please call Sonu Media to speak with a live customer service agent.
If you have a network router near the SXBR2 Business Internet Radio, you can use the included Ethernet cable to connect to your network router. If your network router enables DHCP, the Internet connection will be automatically set up. If you want to use wireless connection, please follow the steps below. The easiest way to connect to a wireless network is to have the Business Internet Radio scan for wireless networks, and then choose your wireless network from the list of wireless networks. The Business Internet Radio will automatically do this the first time you power it on.
However, if your wireless network name (SSID) is hidden, or if your network is DHCP disabled, you’ll have to manually enter the network settings. Turning the Scroll knob scrolls through menus and lists to highlight items, and pressing the Scroll knob selects a highlighted item.
Easy Connection to a Wireless Network
1. Plug the AC Power Adapter into an AC outlet, and plug the power plug into the connector on the rear of the SXBR2 Business Internet Radio. Press the Power button if the Business Internet Radio does not automatically turn on.
2. If the Sound System has not previously connected to a wireless network, the Business Internet Radio will display the Network Wizard screen, with Wireless highlighted. Press the Scroll knob. Otherwise, press the Home button, turn the Scroll knob to highlight Setup and press the Scroll knob to select. Turn the Scroll knob to highlight Network Wizard and press Scroll knob to select. Wireless will be highlighted; press Scroll knob to select.
3. At the Wireless screen, Scan will be highlighted. Press the Scroll knob to select.
4. Wait while the Business Internet Radio scans for wireless networks and then select your wireless network from the list. Turn the Scroll knob to highlight your wireless network and then press the Scroll knob to select.
5. The Business Internet Radio will attempt to connect to the wireless network. If you chose a network that requires a password, you will be prompted to enter the network password. Password will be highlighted. Press the Scroll knob to begin entering the password. Otherwise, the Business Internet Radio will attempt to connect to the wireless network.
6. To enter the network password, turn the Scroll knob to highlight each character of the password and press the Scroll knob to select the character. Then enter the next character and continue until you have finished entering the password. If you make an error, press the P3/P8 button (refered to as “DEL (P3/8)” on the display) to erase the character. When you have completed entering the network password, press the SHIFT button (refered to as “ENTER (shift)” on the display).
7. When the Business Internet Radio has successfully connected to the wireless network, “Connected successfully” will be displayed.
GDI-SXBR2 Controls
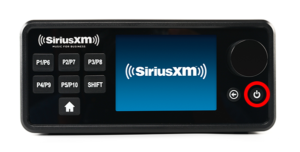
Power Button
The Power button turns the Business Internet Radio on or places it in Standby mode.
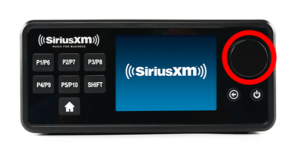
Scroll Knob
The Scroll knob is multi-function: you can turn it clockwise or counter-clockwise and press it to select options.
Turn:
Turning the Scroll knob at the Now Playing screen displays the Channel Listing screen. When in menus or user input screens, turning the Scroll knob scrolls through and highlights menu items and choices.
Press and Release:
Pressing the Scroll knob selects the highlighted item.
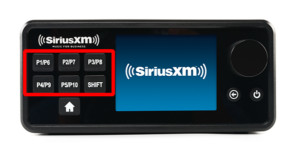
Presets and SHIFT Button
The number buttons are used to store Presets in the button location by pressing and holding the button. Then you can tune a favorite channel just by pressing the button. To access Presets 6-10, press the SHIFT button first, then P6-P10.
Note that when selecting Username and Password information from a user input screen, the P3/P8 button doubles as a Delete button and the SHIFT button doubles as an Enter button. The Display Screen refers to the P3/P8 and SHIFT buttons as DEL (P3/8) and ENTER (shift), respectively.
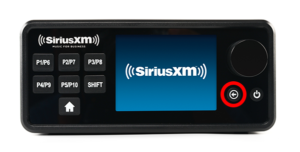
BACK Button
The BACK button returns back to the previously displayed screen. Note that when selecting Username and Password information from a user input screen, you can also use this button as a Delete key instead of the P3/P8 button.
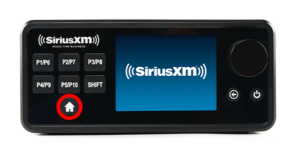
Home Button
Pressing the Home button displays the Home screen showing the listening modes and configuration options for the Sound System.
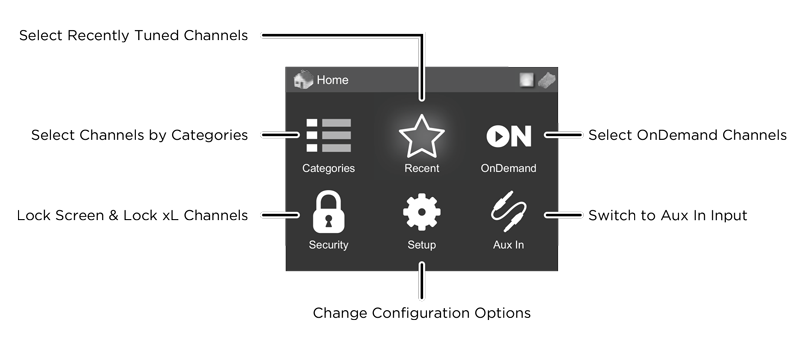
GDI-SXBR2 Home Screen
The Home screen provides access to the different functions of the Business Internet Radio. You can navigate the Home screen by pressing the Home button, turning the Scroll knob to highlight an item, and pressing the Scroll knob to select.
Listening to SiriusXM Music for Business
You can listen to SiriusXM Music for Business with the Business Internet Radio in several ways:
Streaming SiriusXM for Business
Listen to the SiriusXM for Business channels live, or rewind up to the past 5 hours on each channel. Also, you can press the Start Now button and select a show that aired in the previous 5 hours on the channel.
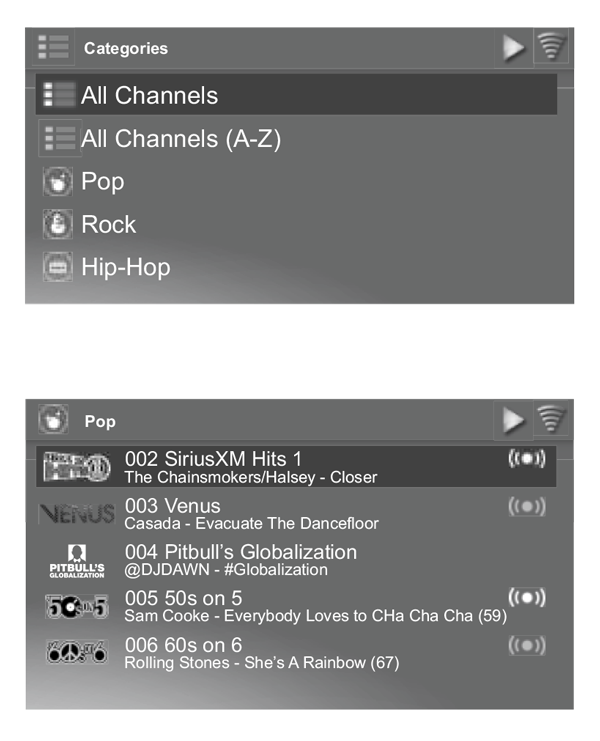
Selecting SiriusXM Channels
Channels can be tuned from a list of all available channels, “All Channels”, or by genre categories.
1. Press the Home button.
2. Turn the Scroll knob to highlight Categories and press the Scroll knob to select.
3. Press the Scroll knob to highlight All Channels and press the Scroll knob.
4. Turn the Scroll knob to browse through the channels, and highlight a channel, and press the Scroll knob to tune the channel.
5. The Business Internet Radio will tune to the channel you have selected, and display the “Now Playing” screen for that channel.
On Demand
Use On Demand to find and listen to shows which have aired previously, or are currently playing, on SiriusXM. If you missed your favorite show, find and listen to it using On Demand. Or just browse the extensive On Demand library for something that interests you.
Recent
The Business Internet Radio keeps a list of the most recent shows and channels you have listened to so you can easily tune to them again.

